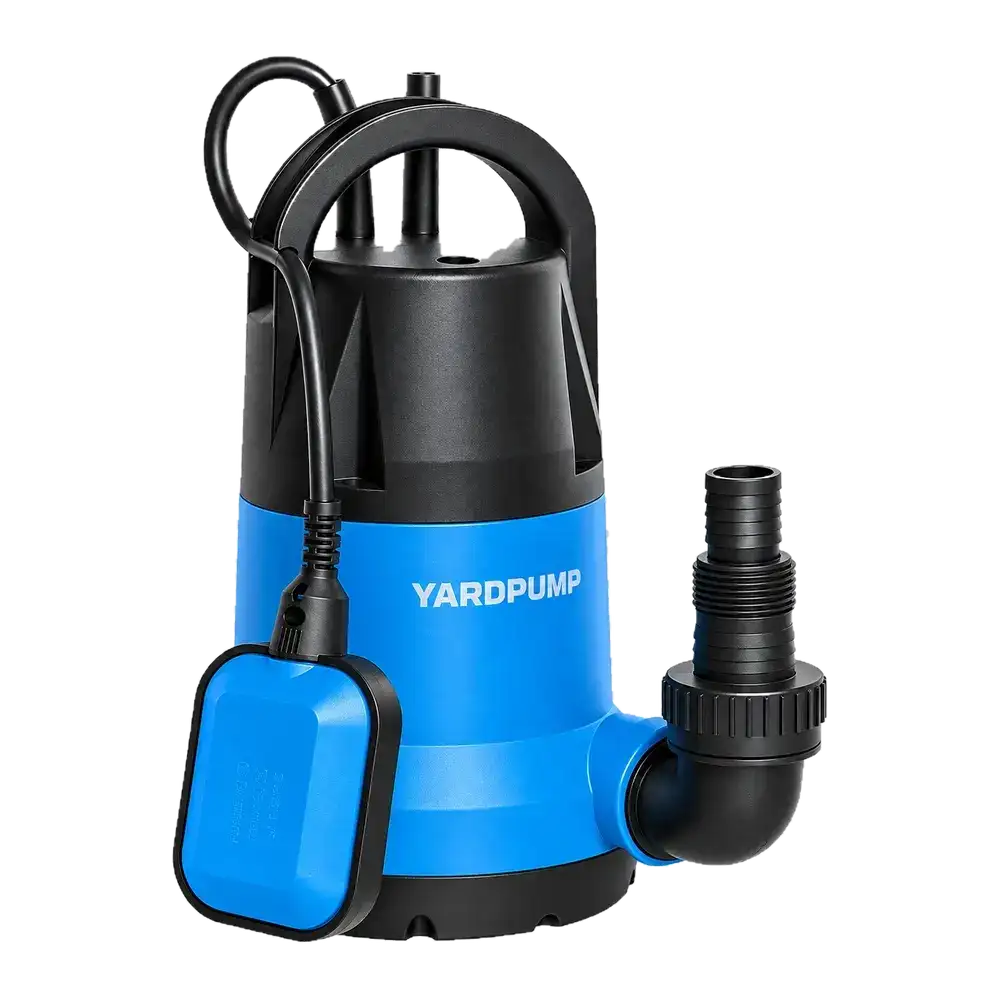
A distributor compares two submersible pumps with similar published duty points. One has a top outlet; the other discharges sideways. Which arrangement is better? In this typical selection situation, the first decision is whether the complete installation fits and works. Outlet direction alone does not establish higher head, better efficiency or an approved motor orientation.
Compare the whole discharge path
A top outlet can suit a hose rising toward the opening of a pit or tank. It may leave more lateral space around the pump, but the hose still needs room to turn below a cover. A low lid can squeeze that turn into a restriction. A side outlet can suit a horizontal pipe route, while requiring extra clearance beside the pump and protection from sediment or nearby walls.
Neither arrangement has a universal hydraulic advantage. Some designs turn the flow inside the casing; others need an external elbow. Diameter changes, hose length, fittings and bends all contribute to the system resistance. Compare the actual pump curves and the supplied connection configuration. A photograph showing fewer visible elbows is not a substitute for that comparison.
Measure an installation envelope
Draw the pump with its connector, hose, handle, cable route and controls. Use both a plan view and a side view. Record the opening size, clearance below the lid, distance to the walls and the space needed to disconnect the hose. An automatic pump also needs the full movement envelope of its float throughout the switching range.
Consider a hypothetical installation with 450 mm below the cover and a pump plus connector measuring 380 mm high. The remaining 70 mm does not prove that the hose can turn safely. Its permitted bend radius and movement during operation still matter. Equally, changing to a side outlet will not solve the problem if the lateral gap is too small. These dimensions illustrate the method; they are not product specifications.
| Check | Top outlet | Side outlet |
|---|---|---|
| Space | Height above connector and exit opening | Connector projection and wall clearance |
| Pipe route | Rise, bend and hose tension | Low-level route and support |
| Service access | Disconnect before lifting | Reach a connector that may become obscured |
The cable and hose must not obstruct the float. Keep the handle accessible and provide a safe removal route. A unit that fits through the opening before connection may be impossible to service after the hose is attached.
Check stability after the hose fills
A water-filled hose has weight and can move as discharge begins. Support the pipework as required by the installation design rather than applying an unverified bending load to the pump outlet. A strained connector may leak externally, pull the pump sideways or interfere with automatic switching.
Do not lift a pump by its power cable or assume that extra tightening will correct a poorly aligned connection. The connector type, sealing method and permitted assembly load should be specified. A flexible section may help accommodate movement, but it does not remove the need for suitable routing and support.
Outlet direction and permitted pump orientation are separate issues. A side outlet does not make horizontal operation acceptable. Cooling, bearing loads, air release and level sensing can depend on how the pump is positioned. Where the installation conflicts with the approved orientation, change the arrangement or select an appropriate model.
Make the sample trial reflect the site
Send the supplier a dimensioned sketch, hose bore and length, liquid-level range and required flow. Assess the sample through installation, operation with a full hose, stopping and removal. Record connector leakage, hose deformation, pump movement and any interference with controls under the specified safe test conditions.
For a performance comparison, use the intended system head and keep electrical supply and liquid conditions consistent. A free discharge test on one sample cannot be compared directly with a restrictive installed hose on another. Confirm which fittings were included in each published curve.
The purchase decision should therefore combine access, pipe layout and the required hydraulic duty. Fitting the bare pump into a pit is only the beginning. The assembled installation must run, stop and remain serviceable within the limits approved for that particular model.
Frequently Asked Questions
Is a top-outlet pump automatically more efficient?
No. Compare the complete hydraulic arrangement and input power at the same required duty. Direction alone does not establish efficiency.
Can a side-outlet pump be laid on its side?
Only if that model explicitly permits the orientation and its cooling, venting and controls remain suitable.
Should every external elbow be eliminated?
Avoid unnecessary resistance, but retain the space and support needed for a sound installation. A crushed hose is not an improvement over a correctly selected bend.